Wednesday 23 May 2012

Sandwich - 1


Preparation time : 20 to 30 mins
Makes : 2

Ingredients :

Bread slices : 6
Boiled potato : 2
Onion : 1
Tomato : 2
Green bell pepper : 1
Chat masala : 6tsp
Cheese : 50 grms
Green chutney : 1/2 cup
Butter : as needed

Method :

Take 3 bread slices, apply butter and then green chutney to each slice on one side.
Take a slice add boiled potato slices and sprinkle chat masala, spread sliced onion.
Cover it with a bread slice, butter side down.
Add sliced tomato, sprinkle chat masala and spread sliced green bell pepper.
Add some cheese.
Cover it with a bread slice, chutney side down.
Apply butter on top.
Roast it on tawa.
Do the same with rest of bread pieces for second sandwich....


You can even grill it .......


Serve them hot.
Enjoy your sandwich :)
Thank you , do post your comments !!!

Tuesday 22 May 2012

Long beans curry (1) / barabatti curry


Preparation time : 25 mins
Serves : 2 to 3

Ingredients :

Mustard seeds : 1/2 tsp
Cumin seeds / jeera : 1/2  tsp
Cloves : 2 (optional)
Onion : 1
Grated ginger : 1 tsp
Grated garlic : 1/2 tsp
Roasted cumin powder : 1 tsp
Turmeric powder : 1/4 tsp
Chili powder : 1 tsp
Grated coconut : 2 tbsp
Long beans / barabatti : 250 grms (or) 12
Tomato : 1
Yogurt / curd : 3 tbsp
Fresh coriander leaves : few springs

Method :

Take a pan, heat it, add a tsp of oil, when oil is hot add mustard seeds, cloves and cumin seeds , let them crackle.
Add ginger , garlic and sliced onion.
Add some salt and fry them till they are light golden brown.
Add cumin powder, turmeric powder, chili powder and coconut.
Add chopped beans, salt to taste and some water to cover them.
Cover and cook for 10 mins.
Add sliced tomato, cover it back and cook for 10 more minutes.
You want them to be cooked longer than if you blanch them, so they absorb the flavor of the curry, but they shouldn't be mushy either.
(If you want your curry to be little thick , you can add some mashed potato)
When green beans are done, taste for salt and other spices and adjust if needed.
If everything tastes good then turn off the heat and stir in the yogurt.
Top it with freshly chopped coriander leaves.
Serve it hot with rice , enjoy your dish :)
Thank you, do post your comments !!!

Tamarind rice / Pulihora

Pulihora is a very common and traditional preparation from Andhra, Karnataka and Tamil Nadu cuisines. Puli means sour and hence the name pulihora as this is made with spicy tamarind gravy mixed with rice. Pulihora is a rice based dish tastes exotic and unique.
It is called as Tamarind rice in English, Pulihora in Telugu, Puliyodharai in Tamil , chitrannam or puliyogare in Kannada. This dish is considered as a  popular festival food traditionally served as PRASADAM in most of the Andhra and South Indian temples. As Hindus consider turmeric powder as a symbol of auspiciousness, this dish is cooked for almost all auspicious occasions and during festival. 
This dish is also considered to be a good stimulant for dead tongue. Pulihora is simple and easy to cook and is inexpensive too. Pulihora is stomach filling extremely delicious for its tangy, sour and salty taste. Pulihora is also known as poor man's feast. This dish can be served anytime for breakfast, brunch, lunch or dinner. Pulihora can be prepared in various styles with either tamarind pulp, mango or lemon juice. It is a refreshing and comfort food and makes a complete satisfying meal.

Preparation time : 30 mins
Serves : 4 to 5 approx

Ingredients :

Cooked rice : 4 cups
Tamarind juice : 1cup
Peanuts : 2tbsp
Chana dal : 2 tbsp
Fenugreek seeds / methi seeds : one pinch
Mustard seeds : 1/2 tsp
Jeera / cumin seeds : 1 tsp
Curry leaves : 2 springs
Red chili : 3
Turmeric : 1/4 tsp
Hing : 1/8 tsp
Green chili : 2
Red chili powder : 1/4 tsp (optional)
Coriander powder : 1 tsp (optional)
Cumin powder : 1 tsp (optional)
Roasted sesame seed powder : 1tbsp (optional)

Method :

Take a pan, heat it, add 4tbsp of oil.
Once oil is hot, add whole red chili, mustard seeds, when mustard seeds splutter add fenugreek seeds, jeera.
Add peanuts and chana dal.
Fry them till they are done.
Add curry leaves, hing, slit green chili, and turmeric.
Saute it a bit.
Add tamarind juice.
Now add coriander powder, cumin powder and red chili powder.


Cook the entire mixture till oil oozes out from it and till it becomes a bit thick.
Add roasted sesame seed powder and some salt to taste.


Take tamarind paste that you prepared  and mix it with your white rice.
Depending on the taste you want , add that much paste.


You can store this prepared tamarind paste in an air tight container and keep it in fridge for up to one month.
If you are preparing tamarind paste to store it then don't add roasted sesame seed powder while cooking the tamarind paste, as it reduces the shelf life. (Instead you can add roasted sesame seed powder to rice while you are mixing it with tamarind paste)
If you are sure that you are going to prepare tamarind rice, then while cooking rice you can add turmeric power in it, so that you get yellow colour distributed evenly to the rice.
This rice tastes better at least after half an hour, after you prepared the rice.

Pulihora goes excellently well with wafers, vadiyalu, chips.
Enjoy your tamarind rice with Onion slice :)
Thank you , do post your comments !!!

gobhi paratha


Preparation time : 30 mins
Serves : 2

Ingredients :

For stuffing :
Cauli flower : 1 (or) 2 cups shredded
Cilantro / coriander leaves : 2tbsp
Green chili : 2 (or) to taste
Salt : to taste
Cumin seeds : 1/2 tsp
Ajwain seeds : 1/2 tsp

For dough :
Wheat flour :  1 1/2 cups
Salt : 1/2 tsp
Water : 1/2 to 3/4 cup

Method :

Make dough :
Take a bowl, add wheat flour and salt mix it.
Add water slowly and make soft dough.
Cover it and let it rest.

Make filling :
Shred cauliflower with grater or food processor.
Take it into a bowl.
Add salt, freshly chopped coriander leaves, finely chopped green chili, ajwain seeds and cumin seeds , mix it good.
Keep it aside for 5 mins.
Squeeze it a bit.

Take one chapati ball, roll it a bit.
Stuff the prepared stuffing in center.


Seal it by lifting the edges up.
Make a nice round again.


Roll it into a thin circle, by dusting with some flour / atta.


Roast it on a tawa using little oil or ghee.


Serve it hot with any chutney or yougurt.
Enjoy your dish :)
Thank you , do post your comments !!!

Monday 21 May 2012

Chicken paratha with left over chicken curry


Preparation time : one hour
Serves : 1 or 2

Ingredients :

Chicken curry : one bowl
Chapati flour (or) wheat flour : 1 cup
Salt : to taste

Method :

Make chapati dough using wheat flour and some salt, keep it aside.
Take left over chicken curry, pressure cook it for 2 to 3 wishtles.
Now the chicken curry will by mushy and you can remove bones from it.
Remove bone from it and mash it with masher or with ladle.
Keep it back on stove and let all the moisture to evoperate.
You don't want it to be runny, it should be little firm.
Check for seasoning and let it cool down completly.
You can make paratha in two ways.

First one is :
Take a lemon size ball of chapati dough.
Roll it to the size , you want your paratha to be and roll it very thin.
Apply chicken stuffing all over it.
Make another paratha of same size , keep it on top of it, seal the edges, just press it/ roll it once.

After rolling, fry it on tawa with some oil/ ghee.


Second way of making is :
Take chapati dough roll it a bit, and stuff  it with a ball of chicken stuffing, seal the edges and make a ball.
Roll this stuffed chapati dough to make paratha.
Fry it both sides on tawa with little oil or ghee.

Your yummy chicken paratha is ready to serve.
Enjoy your dish with yougurt/ curd :)
Thank you, do post your comments !!!

Nuvvula podi (or) sesame powder


Preparation time : 30 mins
Makes : 250grms

Ingredients :

Sesame seeds : 250grms
Chana dal : 1 tbsp (optional)
Urad dal : 1 tbsp (optional)
Red chili's : 6
Salt : to taste

Method :

Take a pan, fry sesame seeds with all other ingredients except salt.
Fry them till they slightly change their colour to nice golden brown or till you get nice aroma .


Take everything into jar and grind it into a nice powder .
If you grind too much, sesame seeds will release oil and the out come will be like a dough.
So take care while you are grinding.
Add salt, adjust to your taste.
Since we grounded everything we need to wait until the powder comes down to room temperature.
When it is hot , some times it may be lumpy, after you cool it completely , just mix it once with a fork or with your hand.
Tasty tasty Nuvvula podi is ready :)
Enjoy your podi with hot rice and with a little oil/ ghee.
Thank you, do post your comments !!!

ghee from butter

Ghee is a class of clarified butter that originated in South Asia and is commonly used in South Asian cuisine and ritual .
The word ghee comes from Sanskrit: घृत and has several names around the world (Bengali: ঘী ghee, Punjabi: ਘਿਉ ghyo, Hindi: घी ghī,Gujarati: ઘી ghī, Nepali: घ्यू ghyū, Urdu: گھی ghī, Oria: ଘିଅ gheeo, Marathi/Konkani: तूप tūp, Kannada: ತುಪ್ಪ tuppa, Malayalam: നെയ്യ് ney, Tamil: நெய் ney,Telugu: నెయ్యి neyyi, Somali: subaag, Arabic: سمنة samna, Persian: روغن حیوانی roghan-e heivani, Georgian: ერბო erbo, Indonasian: minyak samin, Malay: minyak sapi, Hausa: man shanu).

Traditionally ghee is prepared with cream collected from curd. People make butter from this cream. ((Meegada ninchi venna teesi, daanitho neyyi tayaaru chestaaru )
You get solids after you make ghee from home made butter ( We call it as Godavari in our place), but when you make ghee with store bought butter you don't get it.

We get ghee in market, but when i came to abroad , i personally dint like the taste of that ghee, so i used to prepare it from store bought unsalted butter.... For more flavor you can add curry leaves, Fenugreek seeds (or) Methi seeds , and drum stick leaves :)


Preparation time : 10 mins
Makes : 200 grms approx...


Ingredients :

Unsalted Butter : 250 grms

Method :

Take a Kadai or pan , heat it , add block of butter to it.


Let it melt completely.
While it is melting remove the impurities that are coming on top.


White colour foam that is forming on top, they are the impurities.....
Take a spoon or spatula remove them and gather them into a bowl.


You need not throw this, you can use this in your general cooking......

After removing all impurities, boil it for one more minute... you can see some solid kind of thing at bottom, at this stage take it out of the flame ..


Let it cool down completely before you store it.
Store it in a container and use it when ever you want it :)
Thank you, do post your comments !!!!!

Monday 14 May 2012

Godhuma pindi morum attu


Preparation time : 10 mins
Serves : 2

Ingredients :

Wheat flour : 1 cup
Semolina / Sooji : 1 cup
Cumin seeds : 2 tsp
Carrot : 1
Green chili : 2 or 3

Method :

Grate the carrot and keep it aside.
Take a bowl, add wheat flour , sooji, crushed cumin seeeds , very finely chopped green chili, mix it good.
Slowly add water to it and make batter like masala dosa batter consistency.
(Pouring batter, but not too thin)
Pour batter in center of tawa and spread it circularly towards end.
Add grated carrot on top.
Cover and cook on one side.


Once done , remove the lid, turn around, cook for some time.
Serve hot with any pickle or chutney of your choice :)
Thank you , do post your comments !!!

Yam fry / Kanda vepudu - 1

Yam is also called as Kanda or Kanda gadda in telugu. Yam fry is traditional dish in the Indian cuisine and popularly made by the vegetarians. Yam is such is a versatile vegetable which can be prepared by roasting, frying, grilling, barbecuing, boiling, and smoked. 
Yam is otherwise also known as Elephant yam and is traditionally cultivated in Andhra pradesh, tamil naadu, Gujarat, Maharashtra and kerala states. Elephant yam is one of the varieties from the yam family. 
If at all you have turned vegetarian and missing your favourite fish fry that Yam fry is the best suitable vegetarian substitute for fish. The appearance of Yam fry is just like fried fish and it also tastes some what like that. Do try out the yam fry and enjoy its taste.

Yams are a good source of dietary fibre, potassium, vitamin C, manganese and vitamin B6. They also provide iron. They are a very good source of energy. They need to be paired with other foods to balance out the lack of other nutrients.


Preparation time : 20 to 30  mins
Serves : 4

Ingredients :

Yam : 500 grms
Onion : 1 or 2
Mustard seeds : 1/4 tsp
Cumin seeds : 1/4 tsp
Green chili's : 2 or 3
Curry leaves : one spring
Turmeric : pinch
Ginger garlic pate : 1 tsp 
Poppy seeds : 2 tbsp
Coriander powder : 1 tbsp
Coconut powder : 2 tbsp
Chili powder : 1 tsp
Salt : to taste
Coriander leaves : few
Lemon juice : 1/2 to 1 tsp

Method : 

Peel the yam (or) cut the skin with knife.
Cut yam into thin long slices (not too thin, not too thick), and bring them to a boil in hot water for 5 mins, so that they become slightly tender and cooked.
(If you boil them too much, after while frying it will break and become mushy)
Dry roast poppy seeds in a pan and blend it into a fine powder and keep it aside.
Take a pan, heat it, add oil , mustard seeds, cumin seeds, chopped green chili's, curry leaves and saute them.
Add very very finely chopped onions, and add some salt, mix well.
Once onions slightly changes their color, add turmeric, ginger garlic paste, poppy seeds powder, coconut powder, red chili powder, and mix well.
Add little bit of water to it and cook for 5 mins.
Once the masala is cooked , it oozes out oil.
Spread the masala all over the pan, (if it is too dry add little water) and add the boiled yam into it.
Let it cook for 5 mins and turn them, fry them evenly till it changes its color to golden brown or till the masala sticks to yam.
Garnish it with freshly chopped coriander leaves and little bit of lemon juice.


Your yam fry is ready to serve :)
Enjoy it with hot rice.
Thank you, do post your comments !!!

Lady finger fry / Benda kaaya vepudu

Lady finger is my all time favourite vegetable.Here is the recipe for Bhendi or Okra fry-


Preparation time : 20 mins
Serves : 2

Ingredients :

Lady finger : 250 grms
Salt : to taste
Chili powder : to taste
Shredded coconut : 2 tbsp
Peanuts : 2 tbsp
Mustard seeds : 1/8 tsp
Cumin seeds : 1/8 tsp
Urad dal : 1/4 tsp
Curry leaves : one spring

Method :

Take a pan heat it.
Add 2 to 3 tsp of oil to it, when oil is hot add mustard seeds, cumin seeds, urad dal and curry leaves.
Add peanuts and Saute them for a minute.
Add cut Lady finger.
Add salt, cover and cook on low to medium heat for 15 mins, stirring at every 5 mins.
Remove the lid, add chili powder, fry them for 5 to 10 mins.
Add shredded or grated coconut, mix it good.
Yummy yummy lady finger fry is ready to serve.
Enjoy your dish with hot rice :)
Thank you , do post your comments !!!

Sunday 6 May 2012

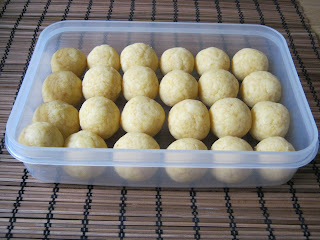
Cake pops

cake pop is a form of cake styled as a lollipop. Cake crumbs are mixed with frosting or chocolate, and formed into small spheres or cubes , before being given a coating of icing, chocolate or other decorations and attached to lollipop sticks.
You can even use left over cake or cake crumbs for making these cake pops.
My cousin and me prepared these last week and it was a hit, all liked it so much. 
Here is the recipe for cake pops.......


Preparation time : 4 hours
Makes : 40 approx

Ingredients :

All purpose flour : 200grms
Baking powder : 1 1/4 tsp
(or alternatively you can use 200grms of self raising flour)
Sugar : 200grms
Unsalted butter : 200rms
Eggs : 4
Vanilla essence : few drops
Butter cream frosting/icing : 4 tbsp approx.
Candy melts : one bag
Lolly pop sticks : 40
Sprinkles : some of your choice

Method :

For cake pops first you need to prepare cake.
Preparing cake :
Take a bowl , add butter and sugar to it and then cream it.
To the flour add baking soda and mix it good.
Beat the eggs with a fork into a small bowl.
To the creamed butter add beaten eggs and flour alternatively in batches and mix them slowly.
Once you added all the flour and eggs add in vanilla essence and mix it once.


Now take a baking tray, line it up with a baking paper, grease it with butter.
Pour the cake mixture in the tray and tap it once.

Preheat the oven to 190 degrees Celsius or 375 degrees Fahrenheit.

Keep the tray in the middle rack of the oven for 20 to 25 mins or till when you insert a tooth pick or knife it should come out clean.
Take it out from the oven, when done.
Let it cool down completely.


Once cooled down completely, crumble the cake.
(or you can use food processor or mixer grinder to crumble it)


Add butter cream frosting to the crumbled cake and mix it till it is incorporated very well.
(You should add butter cream frosting till you can form a nice ball out of the crumbled cake, if you add more frosting the mixture will be soggy, sticky and heavy and the cake pops will just fall off the stick when you try to dip them)
Cover the bowl and chill it for at least one hour.


Now make small golf size balls from this mixture.
For perfect measure we used a spoon.
(we took approx 3 tsp of mixture for one ball, to get all even sized pops)
Keep these in a box and cover it.
Keep them in freezer for half an hour.


Just before taking them out from the fridge, prepare your candy melts -
Place candy melts in a microwave-safe bowl and heat in the microwave on medium for one minute. Take out candy melts and stir thoroughly. They may have just started to melt. Place them back in the microwave and melt for a further 30 sec, take out and stir it once again and micro wave it for 30 more sec. (Total of 2 mins approx,.)
Optional : Melted candy doesn't normally achieve the same silky, runny consistency of melted chocolate. To make it easier to work with, you can add 1-2 tbsp of vegetable oil per 400grms of candy melts. Mix the oil into the candy to create a silky consistency.
If you don't have candy melts and you wanna make cake pops you can even use regular chocolate.....
(Don't melt whole candy, melt small amount of candy only, as of now we just want candy i.e enough to dip the stick)


Take a lollipop stick and dip one end in the melted candy. Immediately insert the stick at centre of each cake ball about halfway through. Don't insert it too deep or too shallow.
Some may brake while handling, do some patch work ;)
Place them back in the box.

Keep these back in fridge for half an hour.
Take them out after half an hour and melt your chocolate.


To dip cake pops make sure the bowl is deep and quite full with candy. Hold a cake pop with the stick that we inserted earlier and dip it fully into the candy. While dipping, make sure to cover till top of the stick to secure the pop in place. Gently hold it (or tap it) to remove any excess candy.

Before it hardens, decorate with sprinkles or any other decorations of your choice.


Leave the cake pops to dry completely.
We took a bowl with rice and kept our cake pops in it or you can even use thermocol sheet to stick your cake pops.


Yummy yummy cake pops are ready.
Enjoy them :)
Thank you, do post your comments !!!

LinkWithin

Related Posts Plugin for WordPress, Blogger...